How To Change Skin Color In Photoshop

Inside the ever-evolving domain of computerized planning and photo adjustment, Adobe Photoshop is an imposing application that empowers picture-takers and specialists to realize their creative considerations. The capacity to change skin tone is one of Photoshop’s most interesting highlights; it opens up a world of imaginative expression and visual account openings. We’ll go over how to alter skin tone in Photoshop step-by-step in this broad instructional exercise, giving you the devices and strategies you require to become capable at this life-changing capacity.
Understanding the Basics
It’s essential to become familiar with some basic Photoshop concepts before diving into the nuances of skin color alteration.
Open Your Image
Dispatch Photoshop and open the picture you wish to work on. Guarantee you are working on a copy of the unique picture to protect the judgment of the source fabric.

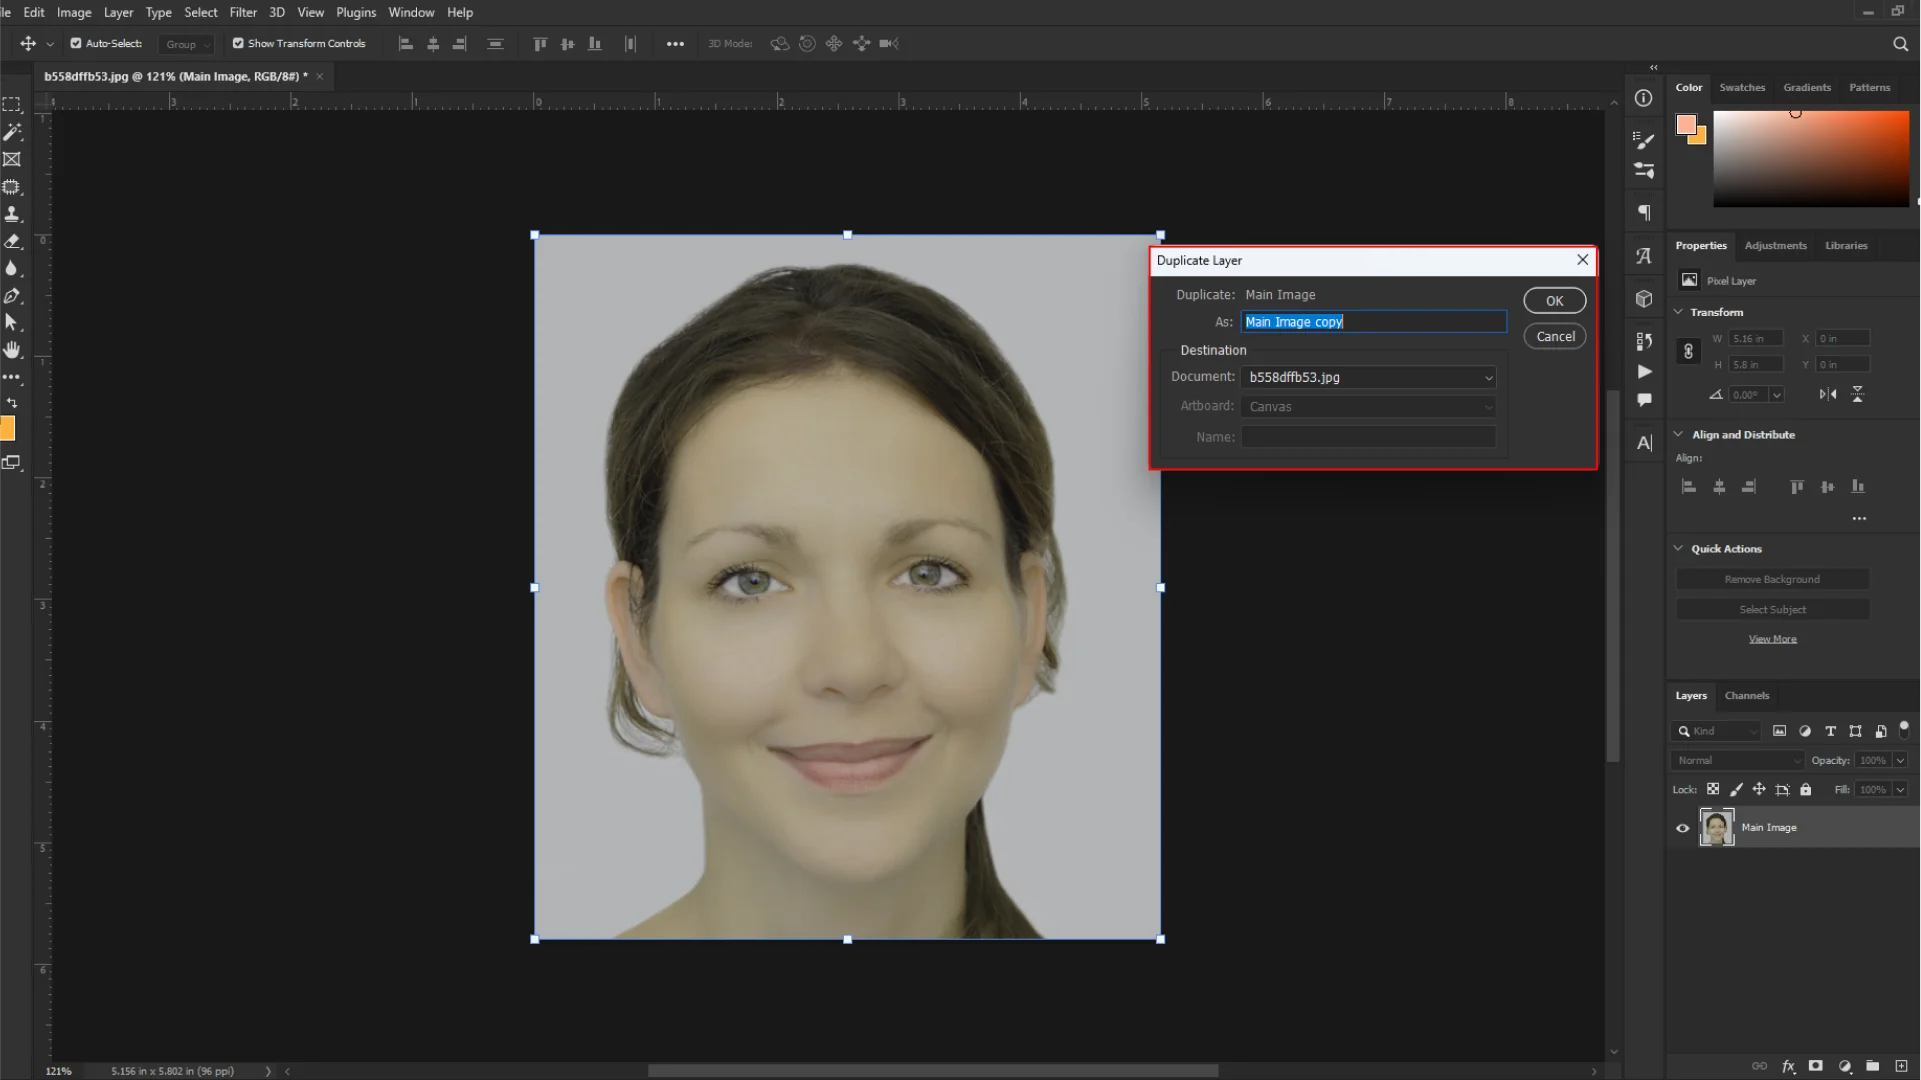
Duplicate the Background Layer
To copy the foundation layer, right-click on it in the Layers board and select “Duplicate Layer.” By taking this step, you can make alterations without influencing the source record since you will have a reinforcement of your unique picture.
Selecting and Isolating the Skin
The key to a fruitful skin color alteration lies in precisely selecting and segregating the skin tones inside the picture.
Select the Skin
Utilize determination apparatuses such as the Enchantment Wand, Rope Instrument, or Fast Choice Apparatus to diagram the zones of skin you need to adjust. Pay consideration to the edges to guarantee a clean and exact choice.

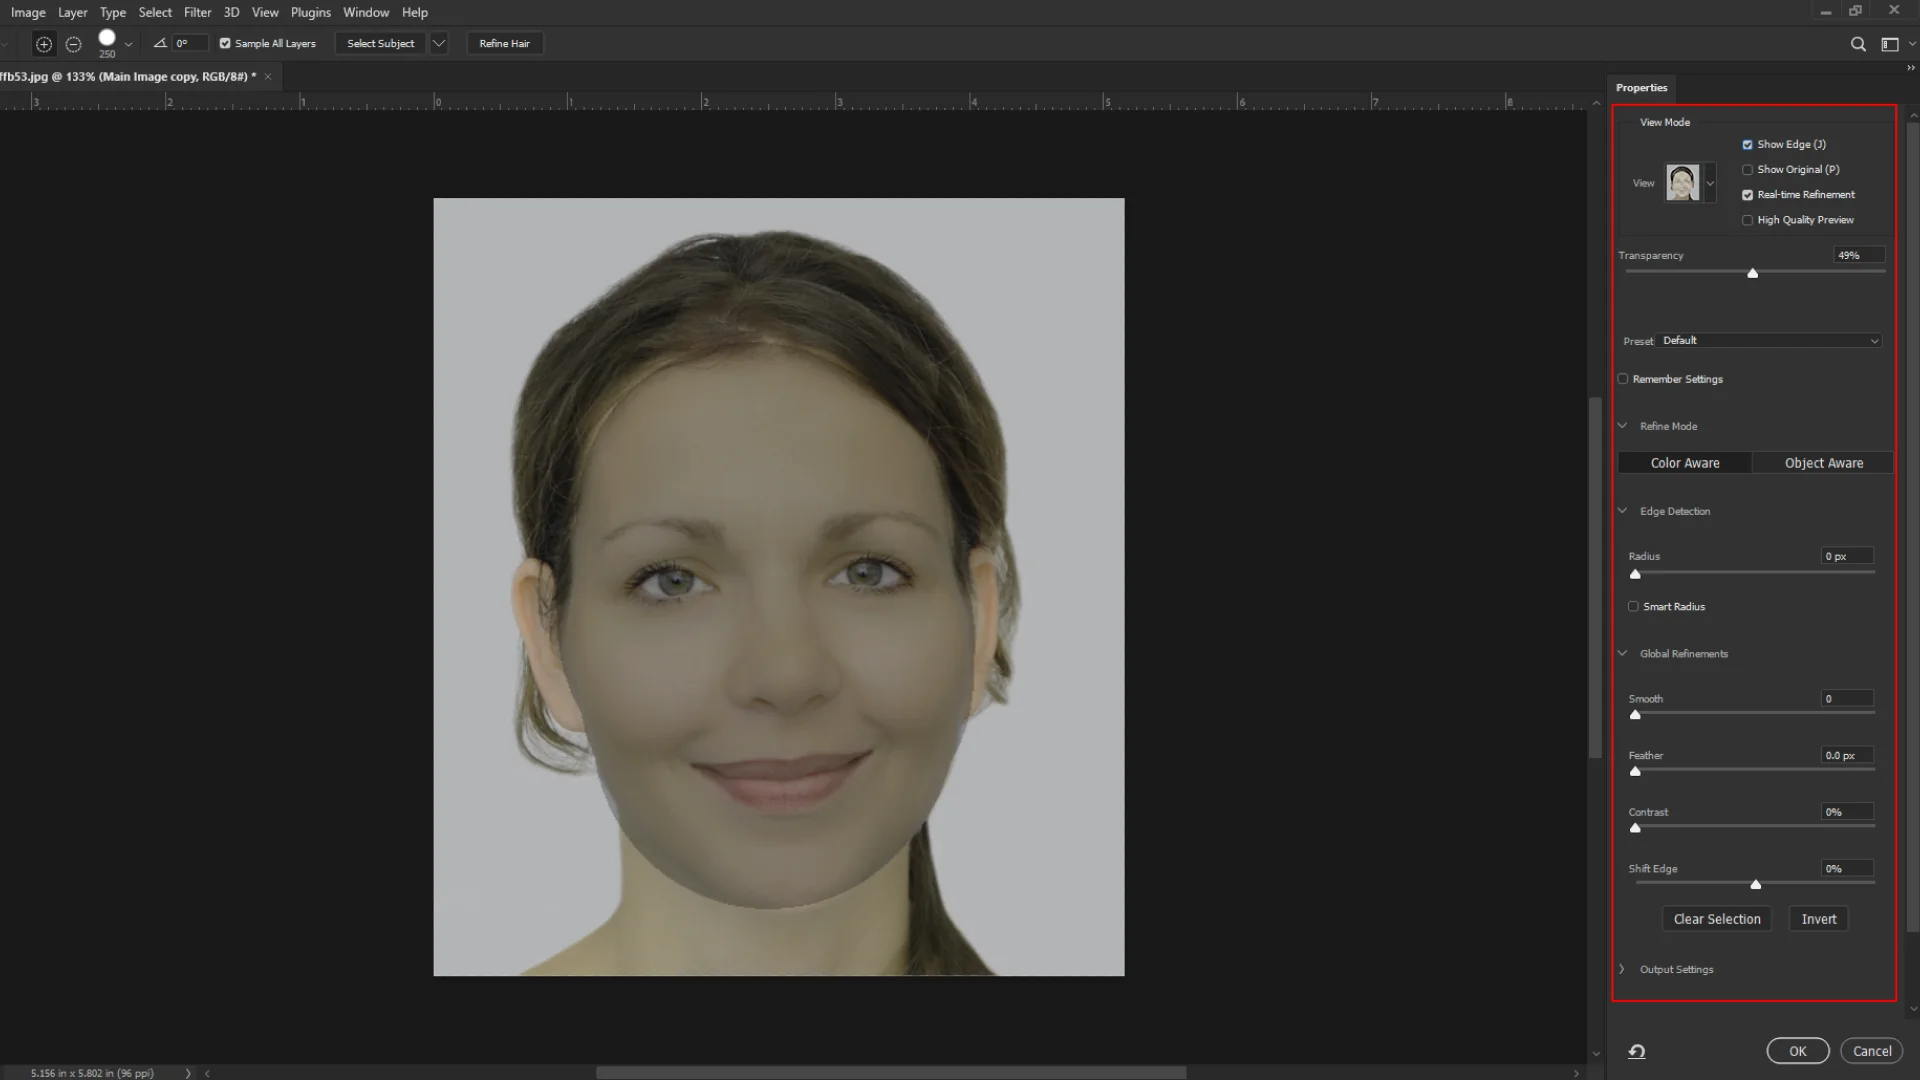
Refine the Selection
To enhance the selection, use the “Refine Edge” option. This tool helps smooth out edges, capturing fine details and stray hairs for a more realistic outcome.
Creating a Layer Mask
Now that you have isolated the skin tones, it’s time to create a layer mask to control the modification.
Add a Layer Mask
With the skin chosen, press on the “Add Layer Mask” button at the foot of the Layers board. This makes a veil, permitting you to specifically apply changes to the skin while protecting the rest of the picture.

Adjusting Skin Color
With the groundwork laid, let’s explore the tools and techniques for changing the skin color.

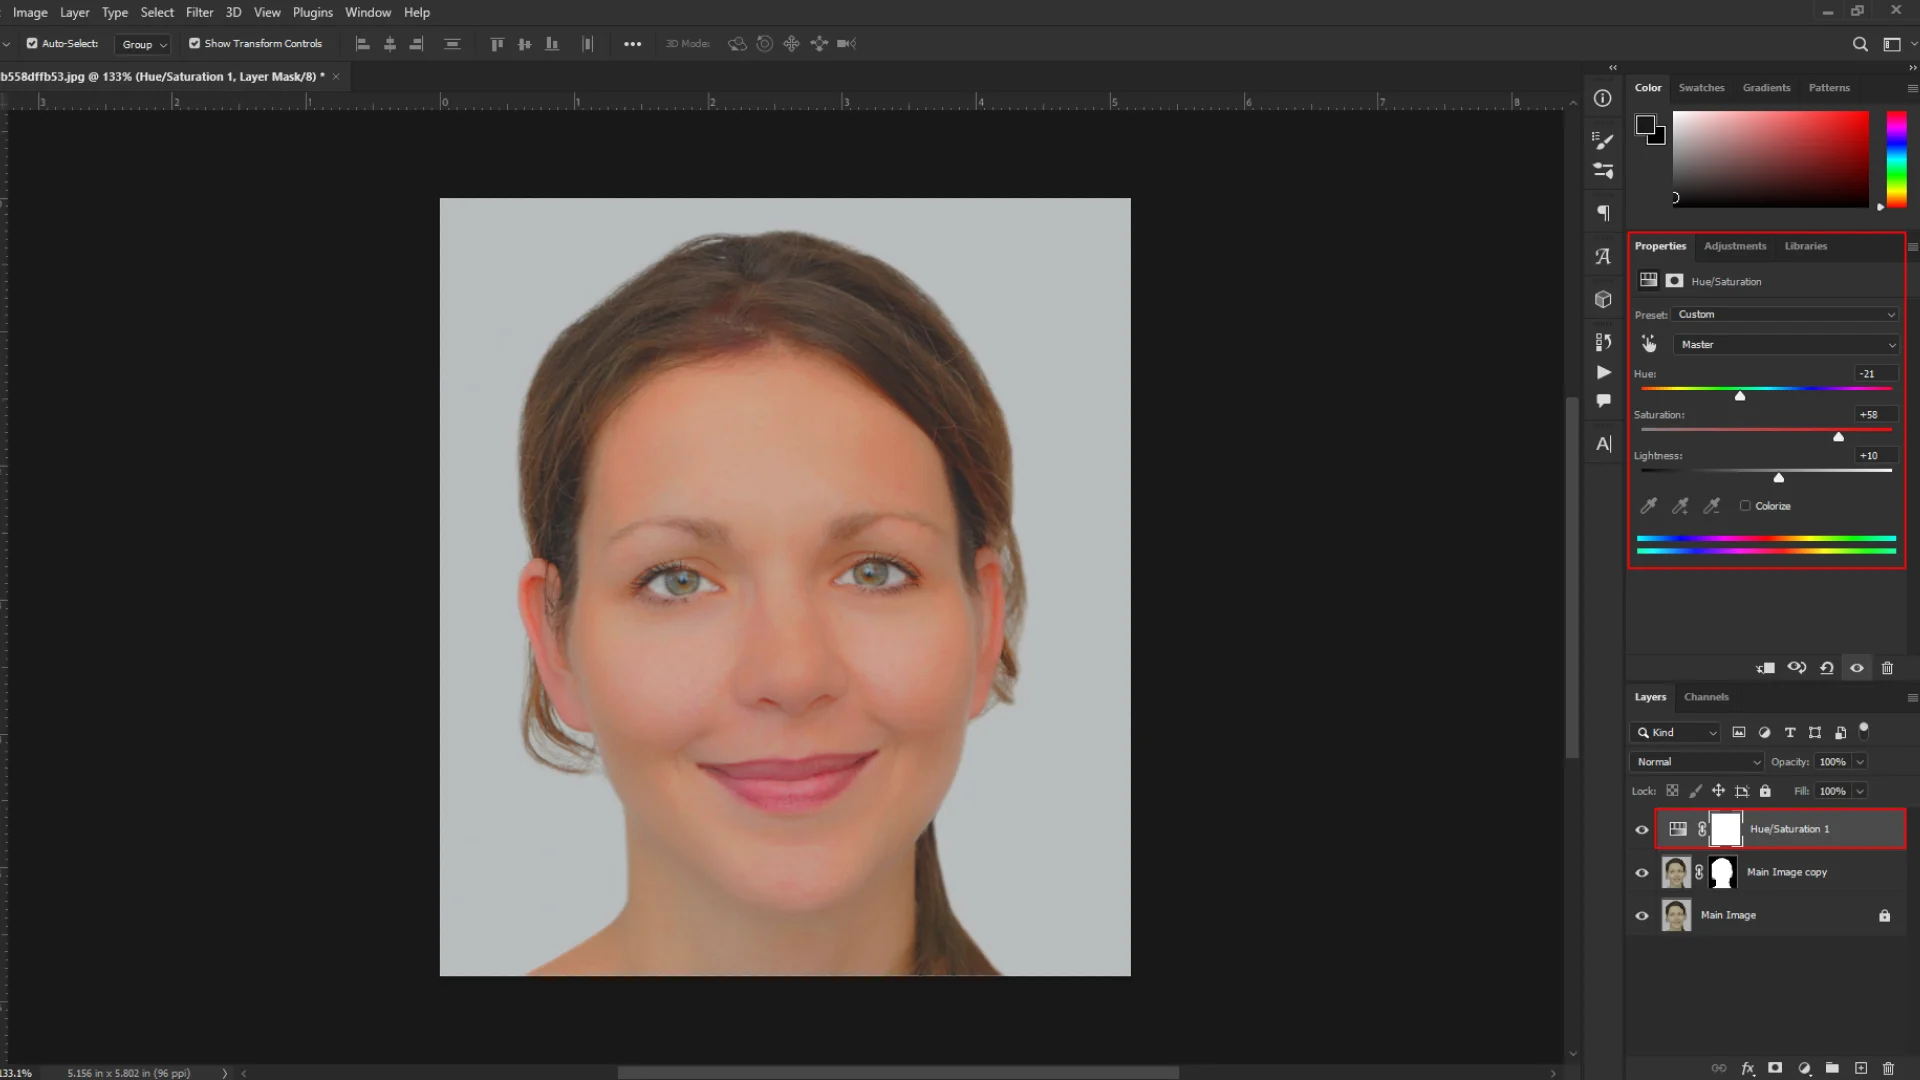
Adjustment Layers
Select the layer with the veil and tap on the “Create Modern Fill or Alteration Layer” symbol. Select “Hue/Saturation” from the menu. This alteration layer permits you to adjust the tone, immersion, and delicacy of the chosen skin tones.
Fine-Tune Hue and Saturation
In the Hue/Saturation discourse box, test with the sliders to accomplish the desired skin color. You can unobtrusively move the tone, increment or diminish immersion, and alter the gentility to coordinate your inventive vision.
Color Balance Adjustment
For more precise control over skin tones, consider adding a “Color Balance” adjustment layer. This allows you to tweak the highlights, midtones, and shadows independently, creating a nuanced and realistic color change.

Refining Details for Realism
Achieving a natural-looking skin color change requires attention to detail and finesse.
Layer Styles
To add depth and realism to the modified skin, explore layer styles such as “Bevel and Emboss” or “Inner Shadow.” These subtle effects mimic the play of light on the skin, enhancing the overall authenticity of the image.

Brush Tool for Detailing
Use the Brush tool with a soft brush to manually refine areas where the color change may look less natural. Adjust the brush opacity to blend changes seamlessly and address any inconsistencies.

Global Adjustments for Cohesiveness
To ensure that your modified skin tones harmonize with the overall image, consider making global adjustments.

Global Color Corrections
Apply global adjustments to the entire image, such as contrast, brightness, and saturation. This step ensures that the modified skin color integrates seamlessly with the surrounding elements.
Background Considerations
If the skin color change impacts the overall mood of the image, make corresponding adjustments to the background or other elements to maintain visual coherence.
Saving Your Masterpiece
Once you are satisfied with the results, it’s time to save your edited image.
Save As a New File
Go to File > Save As and save your edited image as a new file. This preserves the original image while allowing you to showcase your creative skin color transformation.

Congratulations! You’ve now unlocked the transformative potential of changing skin color in Photoshop. Whether you’re a digital artist exploring new realms of creativity or a photographer aiming to evoke specific emotions in your visuals, this skill opens doors to endless possibilities. Remember, practice and experimentation are key to mastering any Photoshop technique, so don’t hesitate to explore different approaches and discover the nuances of skin color modification. Happy editing!